Access Key
Main account creates API Key
Log in with the primary accountConsole Account Management, where you can randomly generate an API Key or customize it, then click OK to save
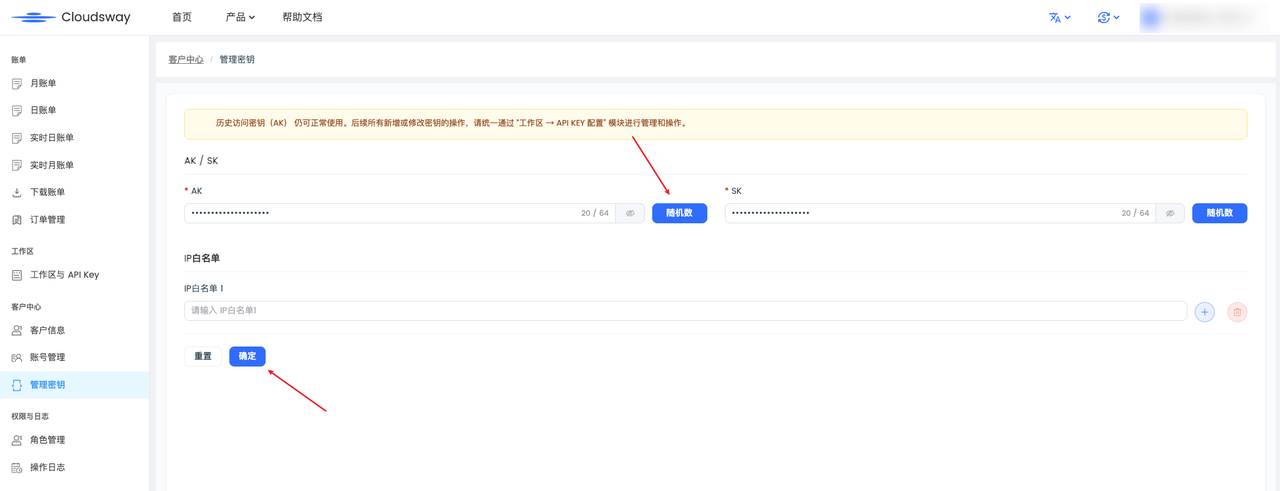
After creation is completed, you can use the newly generated API Key to call the product API interface.
The main account creates sub-accounts and API Keys
Step 1: Log in with the primary account
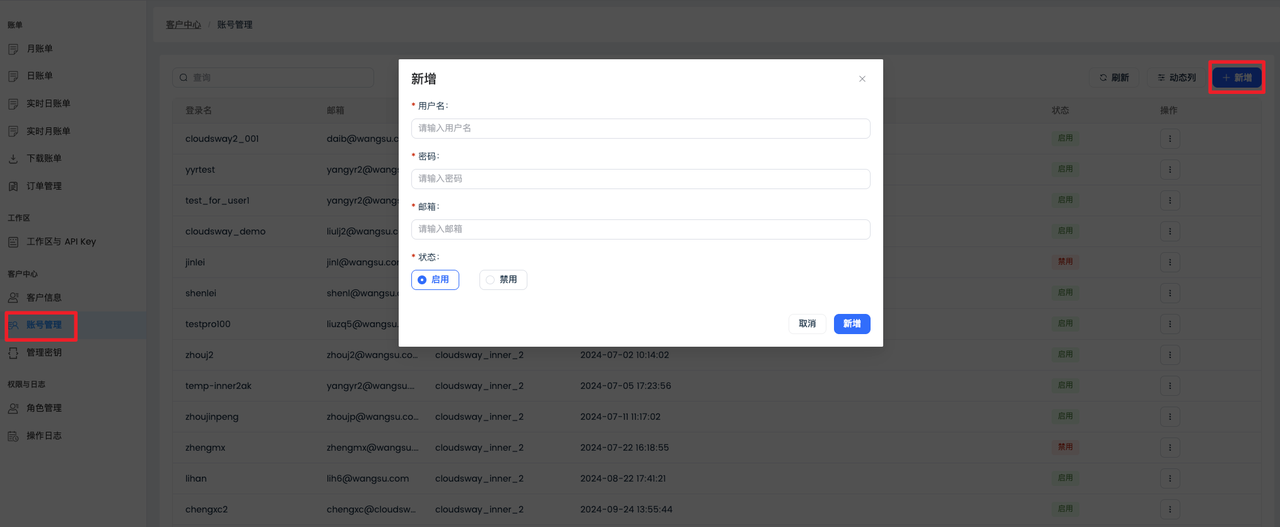
Log in using the primary accountConsole Account Management.
Step 2: Create a sub-account
Click "Add" in the upper right corner, fill in the "Username, Password, Email (reset password or forgotten password will be sent to this email)" of the sub-account to be added in the pop-up window, and click "Add" to complete the addition.
Step 3: Sub-account Authorization
Log in with the primary account workspace (workspace), and grant the newly added sub-account workspace (workspace) API permissions
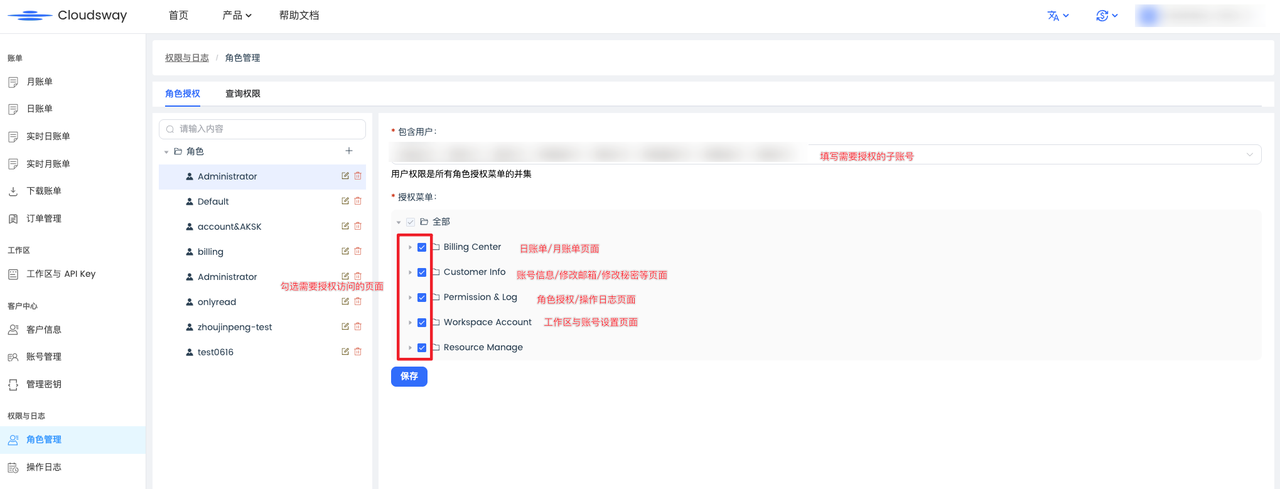
Step 4: Sub-account creates API Key
Log in using the newly added sub-accountAPI Key page, where you can randomly generate an API Key or customize it, then click OK to save
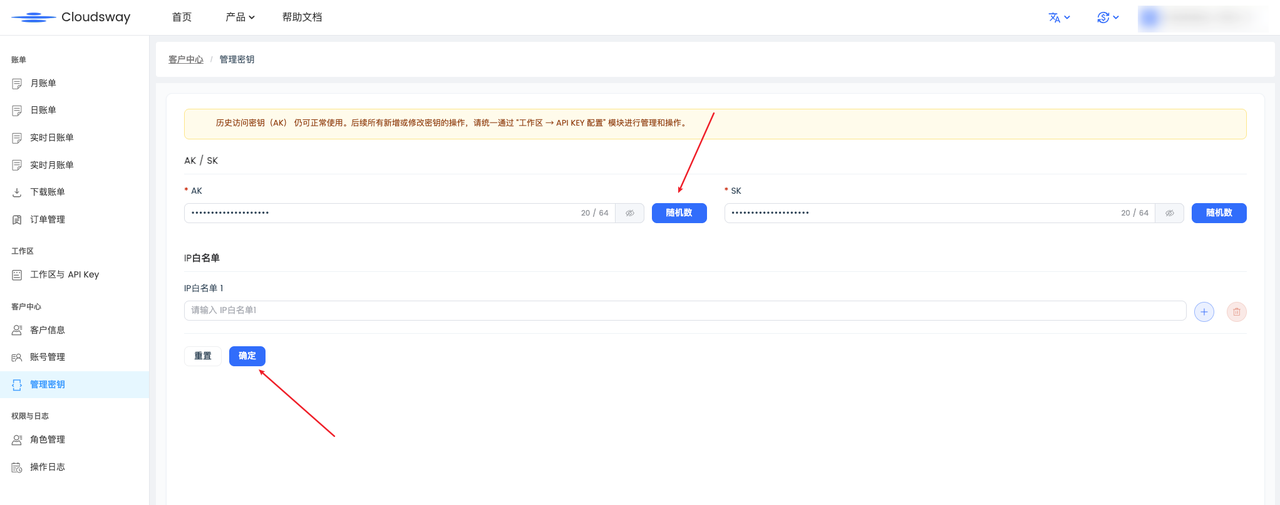
Once the creation is completed, you can use the newly generated API Key to call the product AP interface
Handling method for forgotten password
If you forget your password, on the Console Login Page , click "Forgot Password", enter the correct username and the registered email address, and the original password will be sent to that email
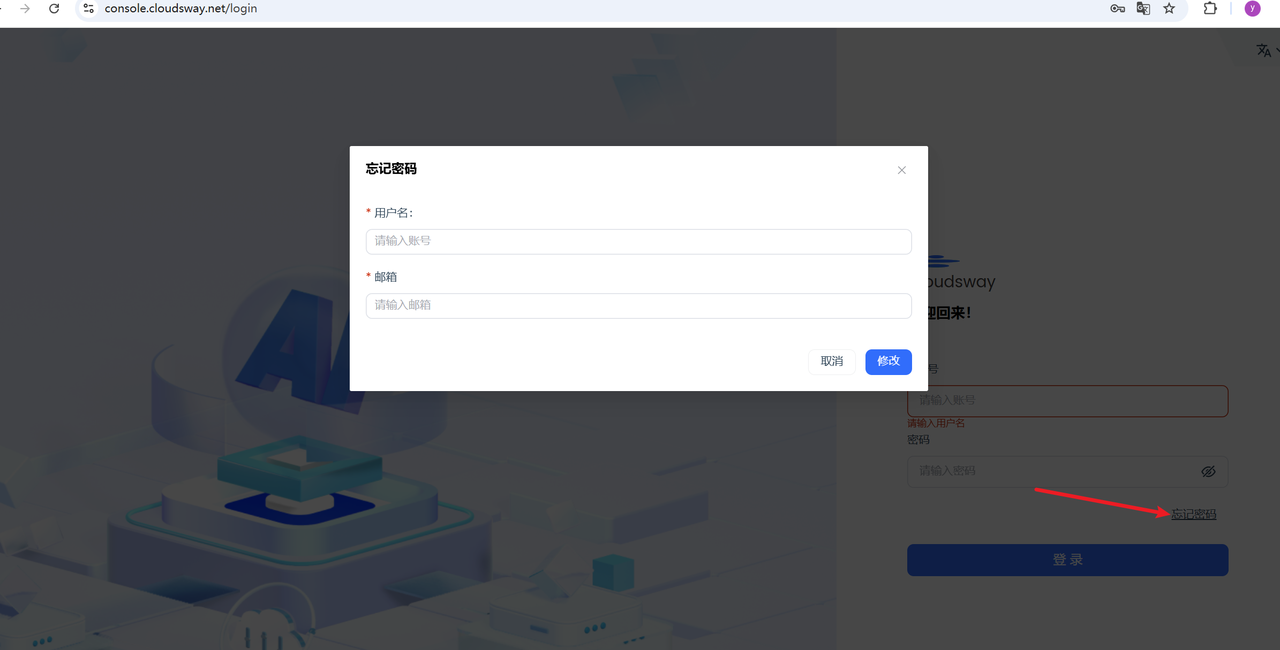
Modify email and enable Multi-factor authentication
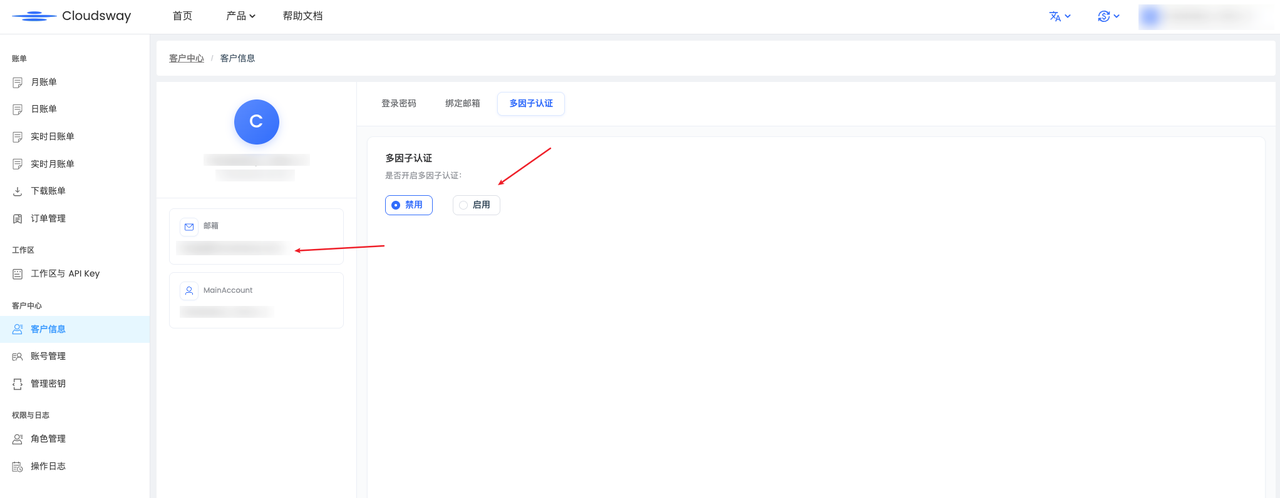
View and modify email
APIcustomer informationto view the original email address bound to the account and support email modification
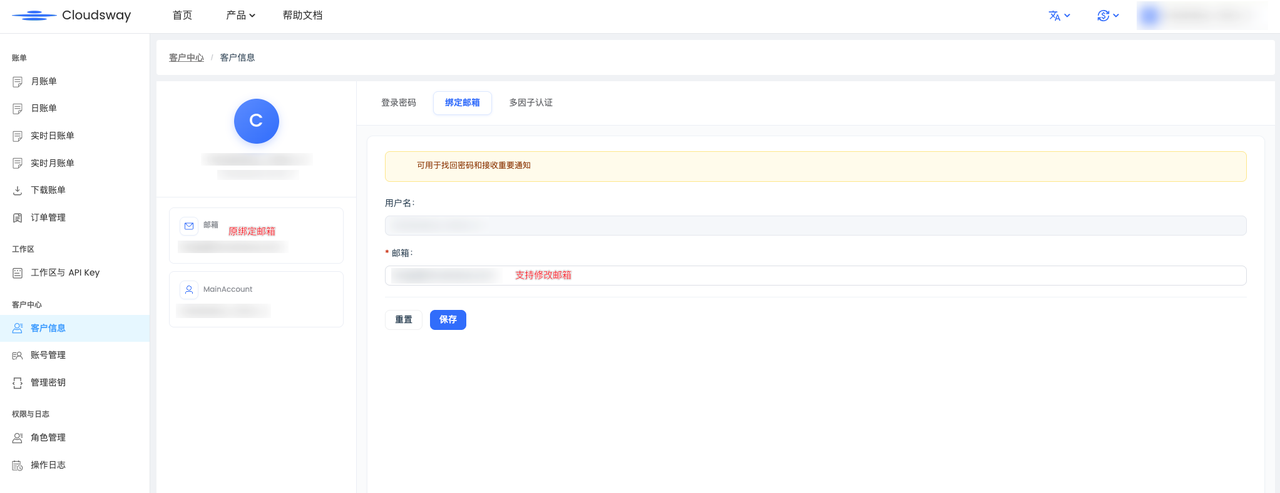
Enable Multi-factor authentication
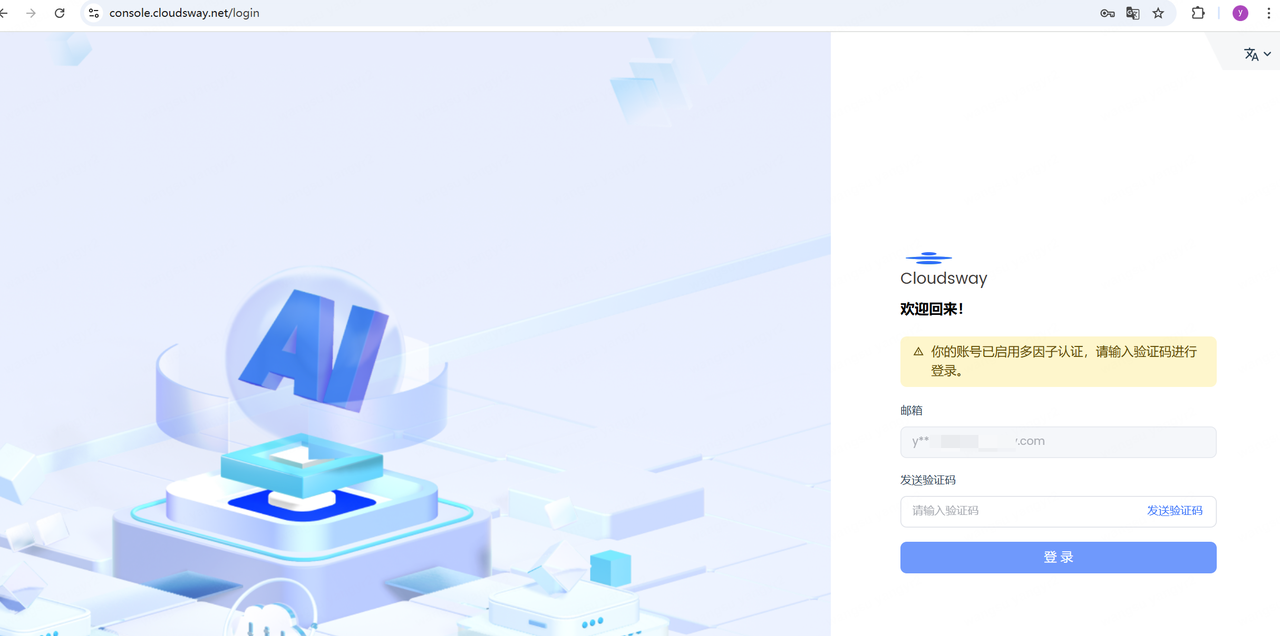
After enabling Multi-factor authentication, a secondary confirmation will be required for each login.
APIcustomer information, navigate to the "Multi-factor authentication" tab, and click Enable. Subsequently, each login will require entering the verification code sent to the bound email for secondary confirmation. Currently, multi-factor authentication only supports email verification, and other methods will be added in the future.